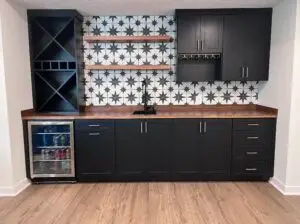
Make sure you are prepared to keep your new finished basement from smelling. Say No, too that musty smell. All too soon that musty old basement smell returns. You know that smell, like banal old socks with a dash of moth balls. That smell your uncle’s old 1950’s wood panel and drywall ceiling bar room in the basement smelled like.
Once a finished basement begins to have that odor its use begins to decline until one day it becomes a big nicely finished closet, and returns to being unused and wasted space. Together we can show you how to produce a space your family will use frequently and for as long as you enjoy the home. It’ll also be a great selling point when it’s time to move on!

Tip #1: Eliminate All Moisture
To keep your new finished basement from smelling, you must prevent moisture at all costs. No matter how well you follow the rest of this guide, mold will always win in the presence of sufficient moisture. That’s why you must never, ever finish a basement space that’s anything less than 100% dry, 100% of the time.
There are no exceptions to this rule.
In fact, it’s not just liquid moisture that will ruin your basement and air quality, but invisible moisture vapor, too. That’s right. You can have a basement that’s looked dry for decades, yet you can still have a moisture problem. How do you know? Polyethylene vapor barrier plastic is your best detection tool.
What You Can Do To Test For Moisture
Cut 24” x 24” pieces of clear polyethylene vapor barrier, then tape them to the walls and concrete floor in several places. Leave them there for a few days, and look for moisture building up on the inside face. What you see under the plastic is what will happen inside your walls after they go up. If you do see droplets of moisture (and it’s not unusual), remove the plastic, paint the bare masonry with a waterproof paint such as Drylok or any other cementitious paint, then test again. Only when your basement passes all moisture tests can you safely finish the space. Don’t let your enthusiasm get the better of you in this matter. When in doubt, get the opinion of an experienced basement contractor that is knowledgeable about the subject.
What To Look For In A Contractor To Keep Basement From Smelling.
Beware of the contractor that paints an overly rosy picture just to get the finishing project. Many contractors will give bad advice for fear of losing a job due to the added, but necessary cost of doing some foundation repair before you finish. Those contractors are only concerned with getting the project and then getting paid. How long the basement lasts after they are gone is no concern to them. The contractor that glosses over any dampness concerns you have is one to avoid. Trust your gut.
Tip #2: Eliminate Organic Materials
To keep Your new finished basement from smelling. Eliminate All Organics. When it comes to basements (and many other areas of life), designing things with multiple layers of safety is always the best idea. If your basement really was 100% dry, 100% of the time, then there’d be no danger in using wood or paper-based drywall for finishing. But what if 100% dry actually turns out to be only 95% of the time? A little bit of moisture can feed a lot of mold, but it has a harder time growing without organic matter to feed on. That’s why it makes sense to keep wood and paper building materials out of the basement, or at least well away from potentially moist masonry surfaces.
Keep Your Basement From Smelling By Choosing Materials That Contain No Organics
This is where the still-common practice of using wooden wall studs and batt insulation in basements is especially foolish. Better to use metal studs, galvanized steel studs go a long way to eliminating organics in hidden places. Just be prepared for push-back from contractors who have “always used wood studs”. I have the greatest respect for good builders, but be warned that there are a whole lot of builders out there who confuse experience with knowledge. Just because a contractor has a 30-year legacy of creating finished basements that generate bad air does not make it right. Remember, had the building code not changed, there would have been contractors using lead based paint and asbestos insulation years after it was determined to no longer be safe purely from the standpoint of it was the way they had always done it.
Tip #3: Use Impervious Insulation
Moisture can invade a basement from two directions. It can travel through masonry walls and floors in the form of liquid or vapor. It can also come from humid air inside the basement itself. If this air is allowed to make it’s way into wall cavities, it can cause droplets of water to appear out of nowhere within the wall. Hidden mold is then guaranteed. What does this have to do with basement insulation? Quite a bit.
The World Health Organization estimates that between 10 and 50% of the indoor environments where people live and work are damp. This can encourage the growth of mold, mildew and other bacteria, and cause health problems in the young, the very old and those with existing respiratory conditions like asthma.
The 2 Types Of Insulation and The One You Want To Use
There are two kinds of insulations in the world. Insulation that air can move through, such as batts and loose fill fibers. And, insulation that air can’t move through, such as high-permeability foam. The best basement insulation doesn’t allow air to move through it at all. It does not absorb moisture in the event of a liquid leak. This is the best kind of insulation for basements, the best kind to use if you plan to not have your basement smell.
Tip #4: Never Install Carpet Directly On Concrete
Nobody likes to walk on a hard concrete basement floor. That’s why installing carpet and underlay are such popular basement strategies. Trouble is, they can also be very powerful mold breeding grounds. Especially, during hot and humid summer weather. If warm, outside air is allowed to make it’s way into the basement, it will settle on the floor and sneak into the carpet and underlay. Since the concrete floor underneath is always cool, it will cool the air to the point where it begins to condensate. That colder air can not hold the same amount of moisture as warmer air. The result is tiny droplets of condensed water forming within the pile of the carpet and the underlay. Mold loves to grow in conditions like this, and in time, your carpet will smell like a wet dog.
Let the Team at LIVESCIENCE.COM Explain why Humidity in Basements Is Dangerous
Tip #5: Ventilate Only When Conditions Are Right
If you think that ventilation is the best cure for keeping basement humidity right – think again. Ventilation can actually be a source of damaging levels of basement moisture. When it’s warm and humid outside, outdoor air transports moisture inside. As this outdoor air cools in the basement, it can’t hold as much moisture as it once did. It’s not unusual for outdoor air at, say, 75% relative humidity to skyrocket to 90% or even 100% relative humidity when it cools in a basement. Go ahead and open basement windows when outdoor temperatures are cooler than basement temperatures. That’s a good idea and will lower basement humidity levels in most cases. Just never open basement windows when it’s warmer outside than it is inside. The only safe way to lower basement humidity levels under these conditions is with a dehumidifier or air conditioner.
The World Health Organization estimates that between 10 and 50% of the indoor environments where people live and work are damp. This can encourage the growth of mold, mildew and other bacteria, and cause health problems in the young, the very old and those with existing respiratory conditions like asthma.
Dehumidifiers: To Keep Basement Humidity Right, Its All About The Right Size.
With dehumidifiers you always want to make sure you get the right sized unit for your space. Keeping basement humidity right is a science. Using an undersized, small dehumidifier is like expecting one window air conditioner to maintain a cool climate for your entire home. A mechanical impossibility. This is another good question for your contractor. What is the right sized unit for your space? After all, you do not want to buy the wrong size and simply have a device humming and burning electricity adding to your bill all while accomplishing nothing.
Tip #6: Don’t Be Swayed By A Bad Contractor
If you look at newly-finished basements these days, most violate some or all the mold-busting strategies you’ve learned about here. So don’t let popularity or the “experience” of a contractor guide you in the details of how you finish your basement. Make sure your contractor stays up with the current trends in building science research. What’s commonly done today will be considered completely unacceptable tomorrow. Again, lead paint and asbestos insulation are prime examples.
Bonus Tips to Protect Your Finished Basement
Bonus Tip #1: Be Sure To Rim Seal
Impervious insulation is always an excellent idea for basement walls, but it’s absolutely essential where the floor joists of the level above meets outside walls along the edges of a basement ceiling. Most homes have fibre-based insulation stuffed into this place, partially covered by a feeble and pointless layer of polyethylene vapour barrier. But this barrier can never work because it can’t be properly sealed around all those joists. This is why the only mold-resistant way to seal and insulate the rim joist area in your basement is with closed cell spray foam. You need at least 3” to prevent hidden condensation behind the foam.
Bonus Tip #2: Six Smart Recreation Room Refinishing Precautions
Have an old, previously-finished rec room you’re refinishing? It’s virtually guaranteed that mold will be revealed when you tear into those old walls and floors. Follow these six mold-safe demolition features and you’ll stay safe and eliminate mold spores that could otherwise grow back:
- Seal off the basement from the rest of the house before demolition begins.
- Buy and wear a HEPA-rated respirator before you begin demolition work. You don’t know when you’ll encounter mold before you find it.
- Remove all building material back to the foundation walls and move gutted material out from your basement to the outdoors as soon as it comes off.
- Have a dumpster or construction site trash bag waiting.
- Allow two weeks for the bare basement to dry out before you rebuild walls or floors. Ventilate well if outdoor temperatures are lower than basement temperature. Use a dehumidifier if it’s warmer outside than it is inside.
- Use basement drying time to inspect for existing mold. Kill it with a registered, non-toxic fungicide. Use a fogger or spray equipment to get mold control products into all infested areas.


